[Date Prev][Date Next][Thread Prev][Thread Next][Date Index][Thread Index]
Mounting of hinges for new leg system
For everyone that has some of the new hinges or will have them or will
pick up some from me, here are the instructions to mount the hinges.  Yes
we have many of them to be mounted.  The club bought 130 pairs of hinges.
 It is anticipated that several members will buy several sets for their
own scenery modules so the club has about 100 pairs to get mounted.  This
is the first step to getting the new legs attached to the modules.  You
do not need a module or legs to do this first step.  the next two steps
will require those to be finished.

1.  you will need to get some 1x4 wood, preferably minimal knots but pine
should be OK.  Cut the board into 22.5" sections. ( 24" wide module minus
2, 3/4" facia boards)  Since we have a few wider modules, I will get a
count on them at the next show since their boards will need to be longer.

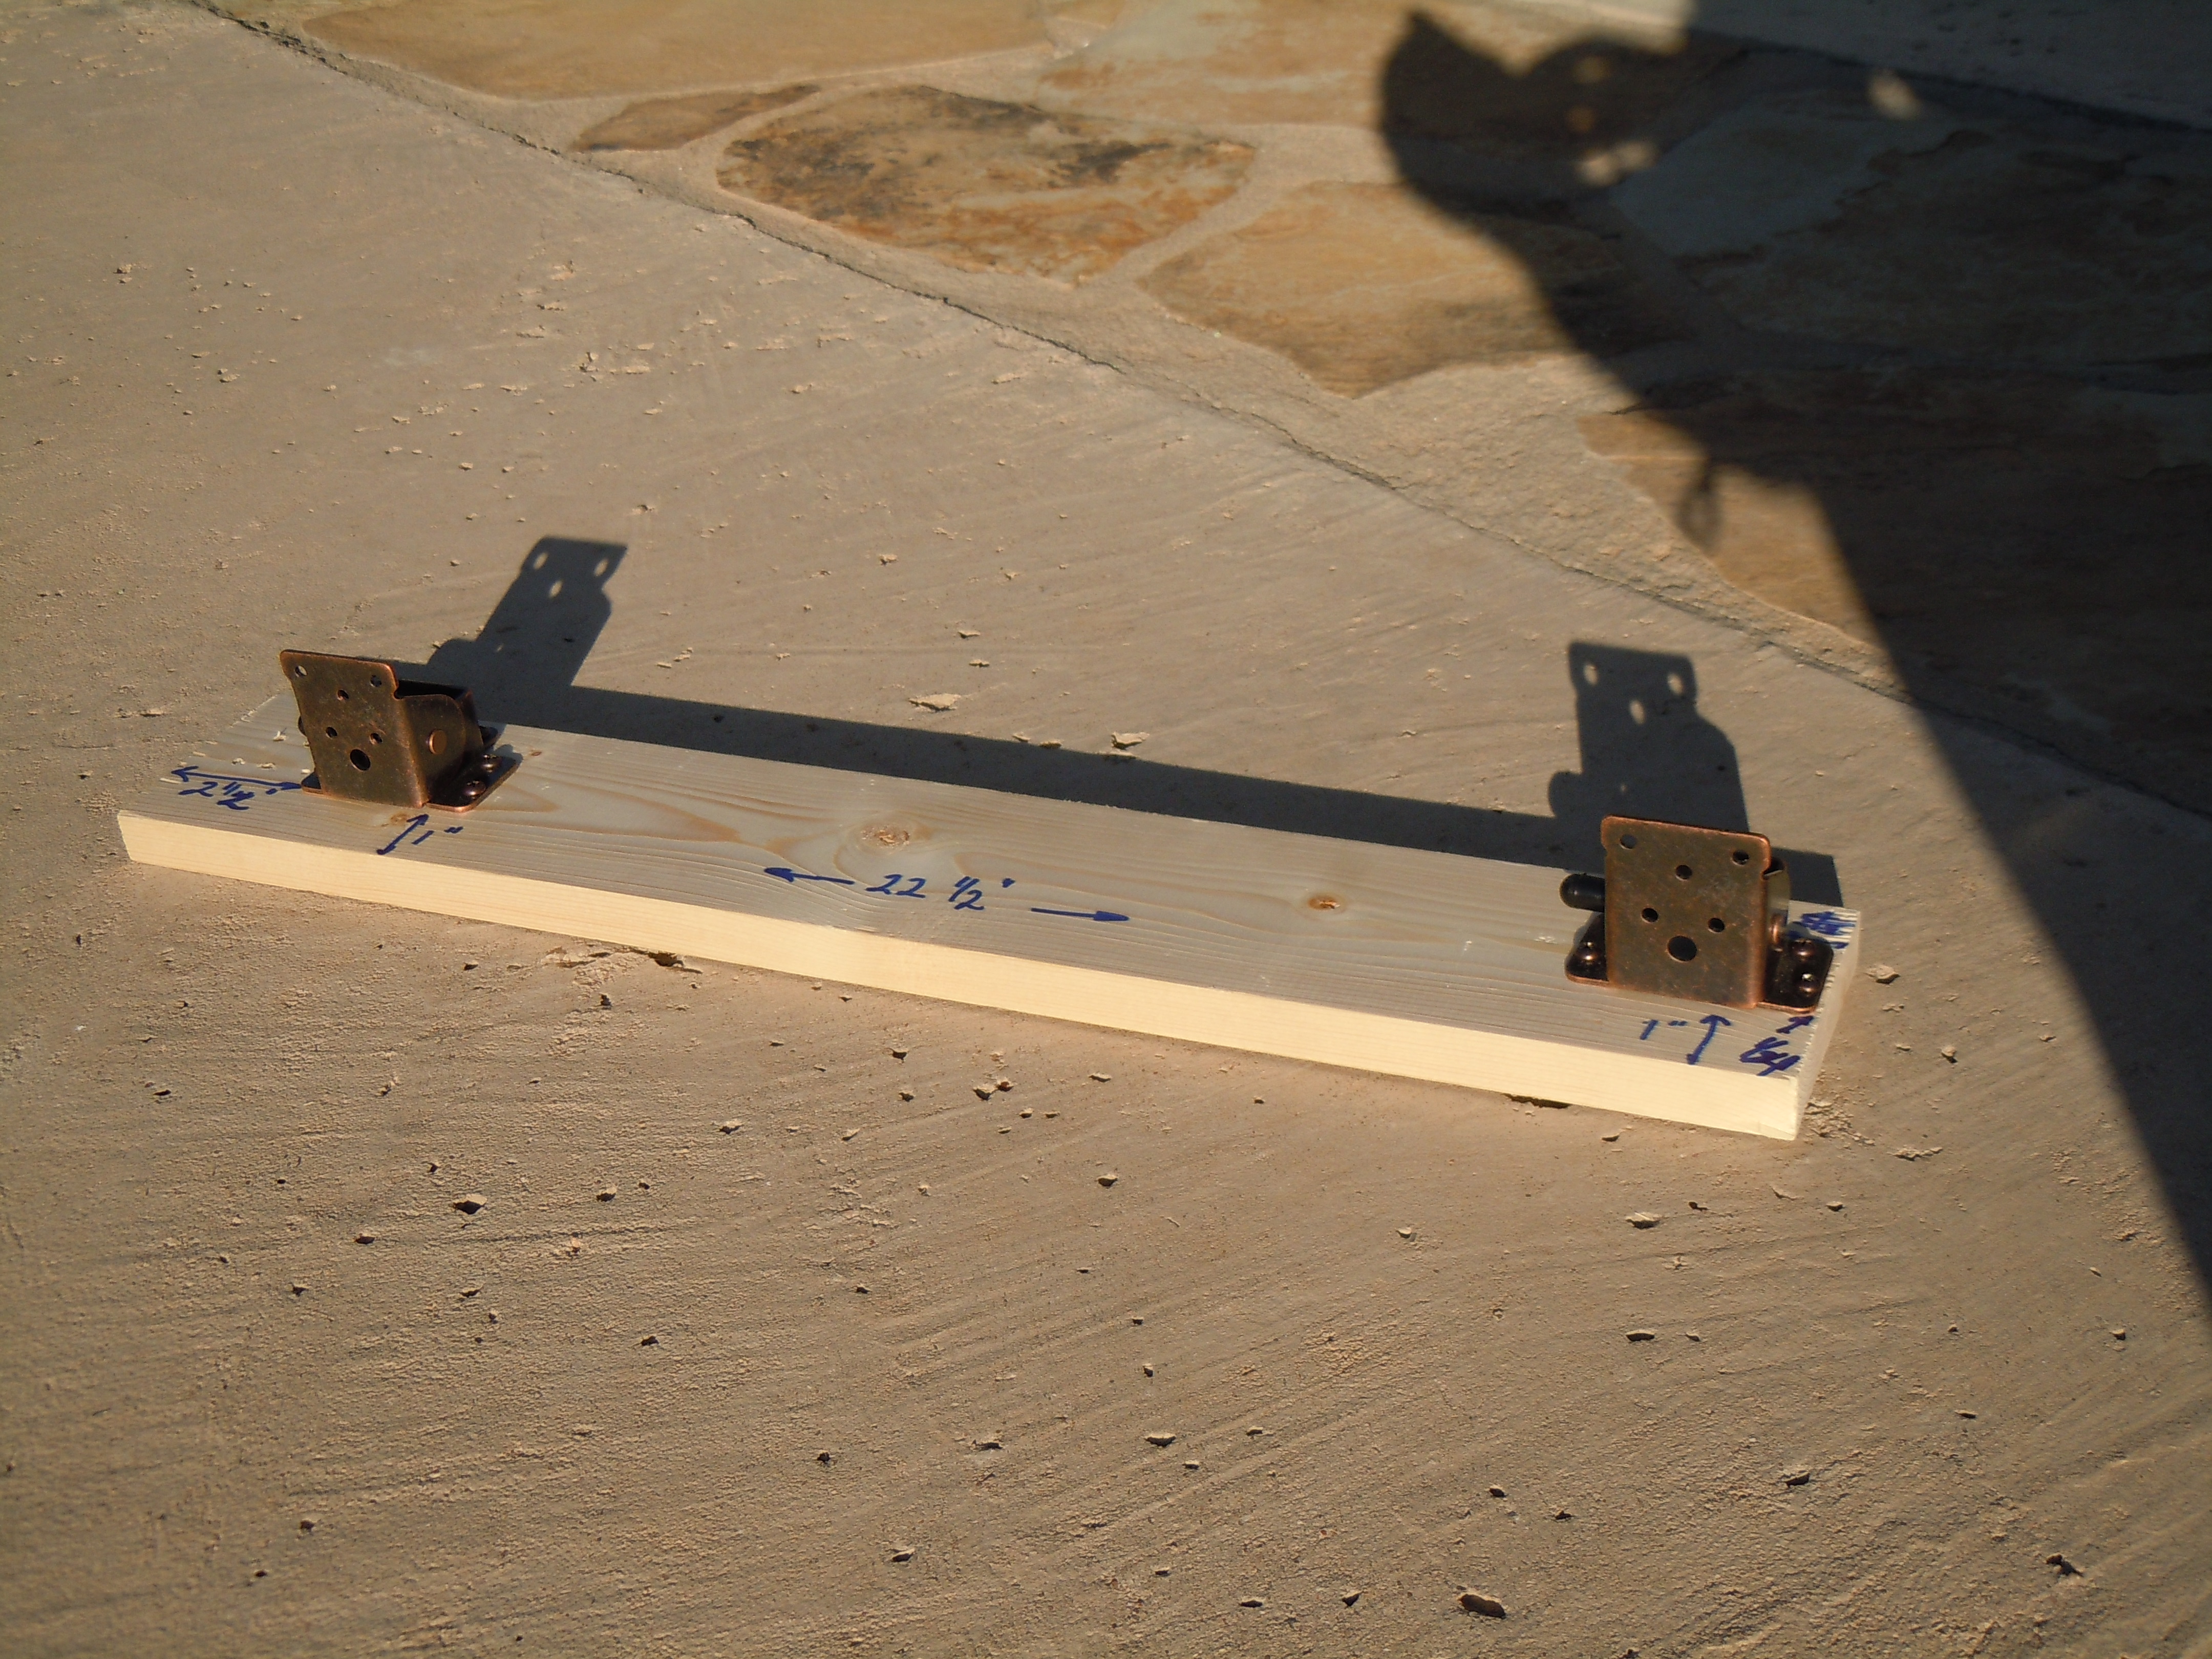
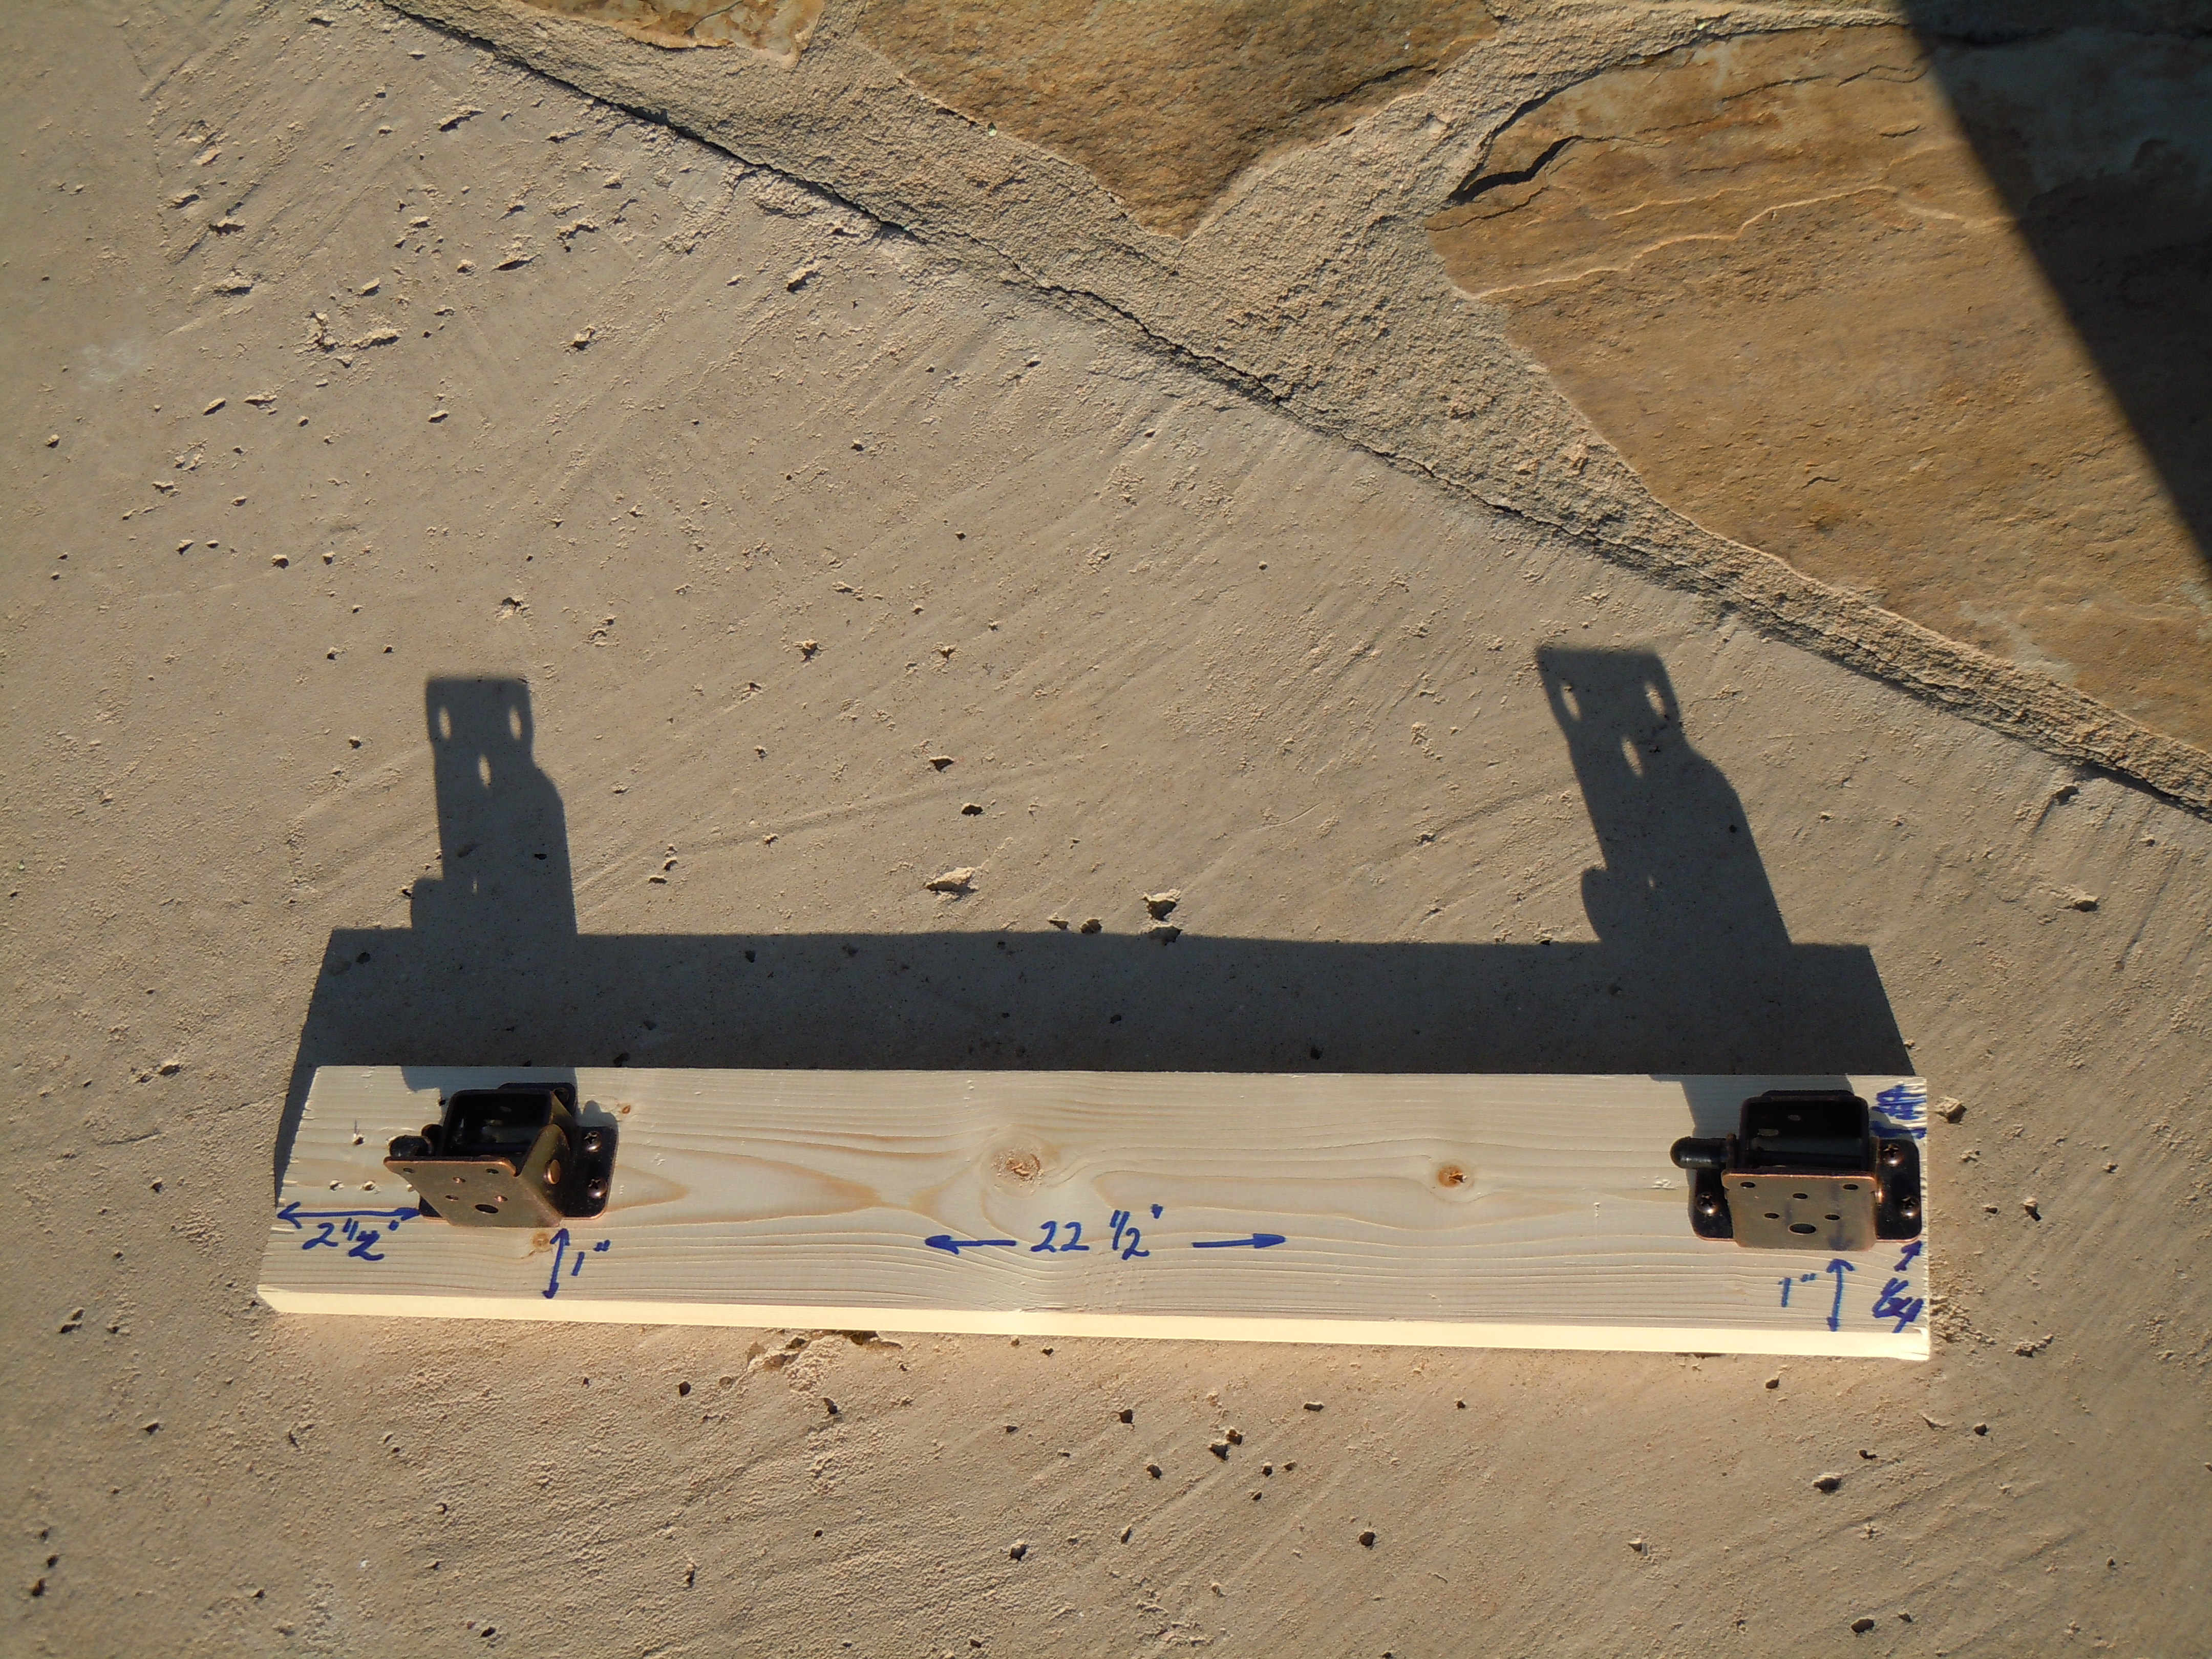
2. The hinges are not mounted at the same position on the board and they
all need to be mounted the same.  See picture.  For this purpose, I will
call the right side the one with the hinge close to the edge of the board
and the left the one with the hinge recessed from the end.  Also this
will be as looking at the large mounting plate on the hinge.  The right
one has its edge of the mounting plate 1/4" from the edge of the board.
The left has its mounting plate edge 2 1/2" from the left end.  The leg
mounting plate needs to be 1" from the edge of the board closest to you .


3. Before you put in the 6 screws, take another piece of straight wood
and make sure the hinges are square to the edge of the wood.  If the
alignment board is run between the hinges and is parallel with the front
edge and the hinges are flush to this, then the legs will swing in a way
to hug the module facia.  Please pre drill the holes a little so that the
wood does not split.  This will make the system last longer.

That is all there is to this step.

Scott


